2026-05-14 16.20.45

Framing your Tiny House - Wood Studs, SIPs and Steel, Oh My!

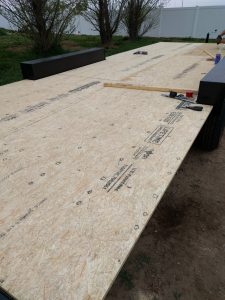
When it comes down to framing your tiny house, there are generally three options (Minus cardboard – and yes, that’s a real thing – look it up!).

  1. Standard Wood Framing
  2. Structurally Insulated Panels (AKA – SIPs)
  3. Steel
  4. What should you choose? Each has their pro’s and con’s. Let’s check them out!

    Standard Wood Framing (2×4 stud construction)

    Pros:

    • People have been building with stud construction for countless years, so finding a qualified person to frame your tiny house will be easier than using any other method. Just make sure they’re familiar with residential codes! Having your entire house framed with some mistakes can be a disaster.
    • Stick framing is cheap. The cost of wood stud framing from Lowe’s or Home Depot will be significantly less in most cases than buying steel or SIPs.
    • This form of construction allows for a lot of adaptation and changes. You’re definitely not “stuck” with a layout or design plan once things get moving. Want an extra window? No problem! You can cut a few studs, add the appropriate headers, jack/king studs and cut out your window. The same applies with most changes.
    • No additional code approvals. This doesn’t necessarily apply to tiny house framing; but why not be as close to residential code as possible? After all, with issues surrounding approval in some jurisdictions for Tiny Homes, you want to ensure that whatever you have built for you will stand up against the local building code!
    • Problems can be fixed with relative “ease”. Standard wood framing has a lot of parts to it (studs, sheathing, etc.), meaning that if you ultimately have a problem that causes damage to your home, you won’t be replacing major components of your framing/walls/roof to resolve the issue. Let’s say, for example, that you have a problem with moisture coming through a window and leeching heavily into some wall sheathing. That’s OK! You can take out what’s damaged and replace it, and not have to replace major sections of an entire wall (which might affect your exterior, insulation AND interior!)

    Cons:

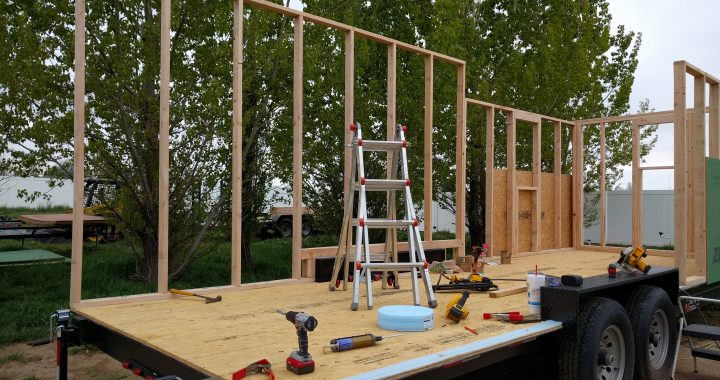
    • Stick framing is slow. Compared so SIPs or Steel framing (Although, with Steel framing it may depend on who your supplier is with regards to the time it will take to put together!) framing a wood stud home can be very time consuming. You have to measure and cut, measure and cut, measure and cut. You have to be sure you have appropriate blocking, spacing and placement to ensure that you can properly attach structural sheathing, etc. This sounds like a nightmare!!! Fortunately, we’ve mastered the art of Stick framing and can generally have an entire Tiny house wall framing complete in 1-2 days! (If you want to learn about how you can do this, you’ll have to attend one of our workshops!)
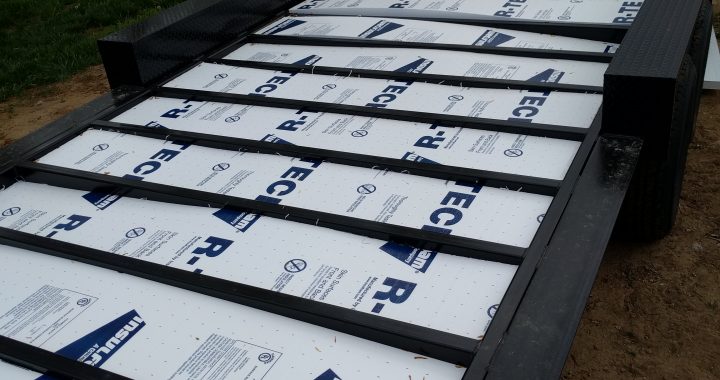
    • Some people will claim that Insulation is an issue here, and we will agree, and disagree at the same time. Firstly, wood DOES leech R-Value of insulation, however it’s absolutely not a conductor of heat/cold as steel is. Yes, you will lose some insulating benefits of a home by having wood studs, but there are ways to combat this. For instance, Huber engineering offers sheathing that has rigid foam insulation sandwiched between the stud and the sheathing. This essentially negates and R-Value loss from wood framing. Using spray-foam insulation will combat most of this anyway! Spray foam insulation is much more effective at keeping the heat in, the cold out, or vice-versa.
    • Stick framing isn’t straight! Yes, this is absolutely possible. If your builder (or you, if you are a DIY’er) isn’t careful, it’s possible to end up with a wall that isn’t straight. When you buy wood studs from your local supplier (Home Depot, Lowes or the local lumber yard) you’re likely to get some studs that have a higher than “normal” level of moisture inside them. As these studs dry, they may warp. This can cause real problems when framing your house. Also, compared to 10-15 years ago, most of the lumber you buy at the local big-box stores just isn’t up to par with the quality it used to be. You’ll undoubtedly find some studs in a bundle that you purchase that aren’t very straight. We suggest that you buy from a local big-box store (Lowe’s or Home Depot) and be picky with the wood you use! Make sure it’s dry, and if it isn’t straight, don’t use it! You can return it and get something else. When ordering your framing studs, account for an extra 15%. This will be good enough (generally) for waste and warped/bad studs.
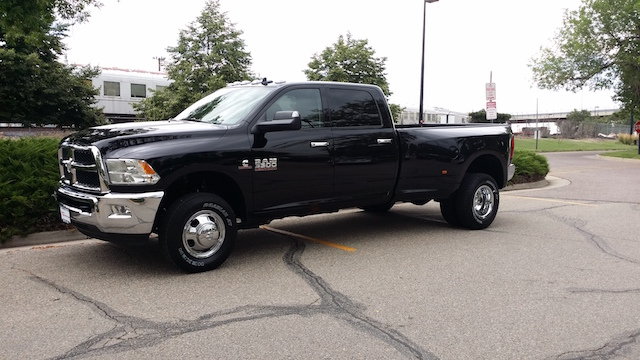
    • Stick framing is heavy!!! Yes, it’s heavier than the option of Steel, and this can lead to repercussions. For instance, you may need a heavier-duty trailer. This is an extra expense. You may need a truck with a heavier towing capacity, this can be an extra expense.
    • Structurally Insulated Panels (AKA SIPs)

      Pros:

      • SIP construction is fast. If you have a builder who’s familiar with SIP construction, they can generally get your tiny house assembled in as little as a day!
      • SIPs are air-tight. With minimal places for air to leech through the walls, SIP construction can be extremely air-tight, which will ultimately aid in reducing your costs to heat or cool your home.
      • SIPs have great insulation value….SOMETIMES. If you get SIPs with Polyurethane foam sandwiched in-between the wood panels, then you’ll see a R-Value of roughly 7 per inch. Other types of foam (Expanded Polystrene), for example, can have a surprisingly low R-Value of only 3.5 per inch – which with a 3.5 inch SIP panel, is only an R-Value of 12.25 – lower than you’d get with standard R-13 roll insulation you can buy off the shelf at Home Depot/Lowes! The benefit however, even with a lower R-Value is that you will get less thermal bridging, since the dimensional lumber that you use will be far less than used with standard wood framing construction.
      • SIPS will save you money over time. Because you have SIPs, you will use less to heat or cool your home over standard wood framing. While it may take many years to see the benefit of this, eventually you’ll see that you have used less resources to maintain a comfortable living space for yourself with using SIP frame construction over wood frame construction.
      • SIPs are super strong. Because of the bonding strength of SIP panels wood to foam, you’ll find superior racking & shear wall strength with SIP construction.
      • SIPs resist mold and insects. This is true of most structures that use Spray Foam (which is what’s generally found in the SIP panel!). Mold can lead to costly repairs, as well as health problems, so this is a big benefit! This does however only apply to the foam, and not the wood of the panels. These things can get moldy, so ensure that you’re home is built correctly!

      Cons:

      • SIPs are strange! There are a lot of builders that don’t know how to work with or install SIPs! Make sure that you are getting a builder with the experience necessary to make your project go smoothly!
      • SIPs require a lot of attention. SIP Panels require that you pay very close attention to seams and gaps. If you do not get the proper seals and gaps filled once you have assembled your SIP panels, you may ultimately have issues with these panels. Give each SIP panel installation (especially at the roof) the attention it needs to ensure a quality, complete installation
      • Some SIPs… Suck. Not all Structurally insulated panels are manufactured equally. Make sure that you, or your builder, are buying QUALITY panels from a reputable manufacturer! Buyer beware here!
      • SIPS don’t allow for a lot of flexibility or change. Although possible, modifications to an initial project and/or layout can be very costly to you. Be aware that some changes (window or door layout, for example) may require you to order new SIP panels from your manufacturer and delay your build time. Make sure if you’re using SIPs to build your Tiny Home, that you’ve made your final decisions prior to you (or your builder) ordering your panels.
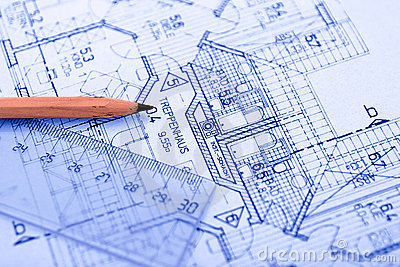
      • SIPs require a lot of planning! Because you are limited in flexibility and changes, you need to ensure that you have done all of your planning (and we mean ALL of your planning!) up front. Remember that this planning doesn’t just include the layout of your windows and doors, but for electrical as well. Most SIP manufacturers will have a channel set for you to run your electrical, so make sure this is planned will in advance!
      • SIPs may require extra ventilation. Because of how air-tight your tiny home may be with SIP construction, you may need to install additional ventilation or air-exchange systems. These can be costly! Some HRVs (Heat Return Vents) can cost you as much as $1000.00!! You can bypass some of this by opening a window. But keep in mind that sometimes the weather outside may prevent you from doing this as often as you may need to!
      • SIP Fixes can be a total nightmare (By total nightmare, we mean…… total nightmare!). If you have a moisture problem on your roof, for example, that has ruined your SIP panel; you may find that you’re not only replacing an entire panel, but also that section of the roof and interior (and maybe even electrical or plumbing depending on your design/layout). This can be a very significant cost to you, and may take weeks to fix!
      • SIPs can take a long time to order. Some manufacturers of SIP panels can be 10-12 weeks out from building and delivering your SIP panels. Be aware of this when you’re looking into your build schedule and plan accordingly!

      Steel Framing

      Pros:

      • Steel framing is light. Steel framing can be as much as 60% lighter than traditional wood framing. This can save you cost on a trailer that doesn’t need to have a heavy a load option, as well as giving you other options for types of vehicles to tow your tiny home.
      • Steel framing is straight. Traditional stick framing can have pieces of wood that warp or are not straight. Steel framing is generally straight (and will remain straight) allowing for a more consistent build.
      • Steel framing is strong…. If you use the right stuff! The stuff you buy at Home Depot/Lowes isn’t the right kind of steel to build a tiny home. That steel/aluminum isn’t as strong as necessary. But, the kind of steel framing we build with is an extremely strong, light gauge steel.
      • Steel framing is green. In many cases, steel framing can be recycled or is made from recycled materials.
      • Steel framing is fire resistant. This is pretty self-explanatory! Wood burns a lot better than steel!

      Cons:

      • Steel framing is new to some builders. Not all builders are familiar with the steps involved to build a tiny home with steel framing.
      • Steel framing can’t be changed easily. When getting your tiny house framed with steel, it will require that you provide engineered drawings to the steel manufacturer. This means that you’re generally “set-in-stone” with your design and layout of walls and windows. So, try to pick a flexible layout or at least be very certain with your layout before ordering steel framing!
      • Steel is as NOT energy efficient. Steel is a conductor of heat and cold – not an insulator. You can mitigate this to some degree by using great spray foam insulation, and insuring that you get the foam into the channels and right into all nooks & crannies!
      • Steel is expensive. Steel can be 2-3 times more expensive than wood framing. In some cases, your labor costs can be less, but Steel materials are significantly more expensive than wood stud framing.

      So, what do we like to use?

      Our base tiny house shell, and other builds are wood frame construction. But that doesn’t mean we don’t do Steel or SIPs. Sometimes a customer will request one or the other, or sometimes we can find a reason to shift to a different building method.

      How do you feel about wood framing, SIPs or Steel framing?

      What have you used in your tiny home build and what was your experience?

tinyhousejamboree

We’ll be at the 2016 Tiny House Jamboree!

We will be showing a Tiny House Shell at the 2016 Tiny House Jamboree from August 5-7th! We’ll also be bringing our “homemade” expandable solar generator.

Expect great discount on our custom Tiny House Shells, and our unique hands-on workshops!

Get your tickets here!

Did you attend last year’s Tiny House Jamboree? What did you like the most? What did you like the least? What do you hope to see this year at the Tiny House Jamboree?


2026-05-06 14.30.16

Beware of trailer weight ratings for your tiny house!

The last thing you want for your beautiful tiny home, is to finish it and find out it weighs too much for your trailer. Overloading your trailer capacity can be dangerous, on top of potentially damaging to your tiny home foundation.

Here can be some of the dangers or issues of an overloaded trailer:

1. Unstable turning - An overloaded trailer it can create an uneven, or “bouncy” load. This can mean there’s a higher risk of your tiny home ending on it’s side and possibly hitting or sliding into someone or something else!

2. Inability to slow or stop - Almost all trailers have brakes on each axel, and these brakes are rated for their maximum towing capacity. An overloaded trailer can create a few problems with slowing or stopping. First, this means that the braking system of your trailer may fail prematurely. Imagine driving 60 MPH down the road and needing to come to a quick stop, only to find that you have to stop 14,000 lbs of tiny house with just the brakes on your truck! Next, you could find that while your trailer brakes may be working, because of having an overloaded trailer you may come to a much slower stop than you need or intend. This can lead to accidents, or even worse!

3. Tire blowout - An overloaded trailer can lead to greater stress on your trailer (and truck) tires. This can likely lead to a premature tire blowout. Go back to that same scenario; you’re traveling 60 MPH down the highway and a tire blows on your overloaded trailer! We’d rather not think about it, frankly!

4. Increased downhill speed - When you combine all of these potential issues and dangers, now include the fact that you’re going to a higher speed increase while going downhill.

5. Damaging the axels - An overloaded trailer can lead to trailer axel damage. This can even include the axel’s bending in the middle point. The issue here, is that this can ultimately lead to uneven wear on your tires, and eventually premature tire failure (or even a tire blowout!).

So, how can you be sure that you’re getting the right trailer for the weight of your home? The best way to know this is to trust your builder, but unfortunately this isn’t a guarantee of success. We’re sad to say that we’ve seen a few shell builders that put together a 24′ tiny house shell with traditional stick (wood) framing on a trailer that’s rated for 10,000 lbs. This will likely end up being an overloaded trailer!

When we build a shell for a customer, we take many things into consideration. This can include the length of the trailer, the materials we’ll be building with and even the materials the customer will be finishing their shell with (don’t forget about the details!!!).

In closing… make sure that you’re tiny house foundation will be appropriate and last for the lifetime of your tiny home living!

What is your trailer length and weight rating? How did you get your home built? Do you have any experience with trailer weight ratings and a story you can share with us?


Tiny House Foundation Subfloor

Tiny House Foundation and Subfloor

When building anything, the end result will only be as good as the foundation it was built on. Nothing can be more true and crucial for a tiny home. Some people decide to build their tiny homes on a solid foundation, or skids, but most will end up building on a trailer for various reasons.

Our latest build is on a custom trailer built locally by Trailer Made. As a disclaimer - We’re making this endorsement of Trailer Made tiny house trailers on our own accord, without any request from Trailer Made Custom Trailers, LLC. We’ve built on equipment trailers in the past, but decided to move to a trailer built specifically for tiny homes and we can say that we’ll never go back to building on anything else again! These trailers are built rock-solid and provide you many benefits over buying a different trailer.


If you’ve received a tiny house trailer and you’re ready to get started on your build, it’s critical that you take the time to complete all necessary steps here in the right order. By the time your subfloor is done, you need to be sure of a few things.

  1. Your subfloor needs to be able to breathe.
  2. Your subfloor needs to be insulated.
  3. Your subfloor sheathing needs to be sturdy, installed correctly and secured to the trailer.


Steps to build your subfloor & foundation

Before you get started, get your materials together. We generally use a combination of rigid foam insulation and canned/spray-foam insulation in the subfloor. We also use a sill sealer to prevent some thermal bridging from the metal framing of the trailer. We only use Advantech subfloor sheathing, and since this is being attached to metal framing on a trailer, we also use 2” self-tapping metal screws.

Step 1 - Insulate the subfloor.

We measure the depth of the trailer cavity, as well as the width between the metal framing. In our case, the trailer has a 3” depth, and 14” widths throughout most of the trailer, and a length of 80” between the metal framing as well.

2026-05-05 19.44.57 2026-05-05 19.45.20 2026-05-05 19.45.23

When you’ve got these measurements, start cutting down your rigid foam insulation so that it will snugly fit into these areas. It’s important that you use more than one piece of foam insulation in each cavity to get to the full 3” depth. The reason for this is that you can use the vapor barrier of the foam insulation on both the top and bottom of the cavity.

2026-05-06 14.30.16 2026-05-06 14.52.53

After you’ve got the floor completely insulated, fill any gaps or cracks with canned foam insulation. This is a very important step!

Step 2 - Insulate the metal framing.

Using sill sealer and some construction adhesive, cover each metal framing stud of the trailer with this foam padding. This will not remove all thermal bridging, but it will help significantly.

2026-05-07 10.33.56

Step 3 - Sheath the floor.

As I mentioned before, we only use Advantech flooring. There are several reasons for this, but the main reason is that this engineered flooring is exceptionally water resistant. During construction, your floor WILL get wet, and Advantech flooring will not suffer any negative effects from this. You can read more about AdvanTech flooring here

You may be tempted to lay the flooring across the 8ft of the trailer, and just work your way from the front to the back of the trailer (or vice-versa), but you must avoid doing this. Subflooring is designed (and much more sturdy) when it’s installed perpendicular to the floor studs/joists of the trailer. Staggering the seams of the flooring is another good idea, but with such a small space and such an incredibly strong foundation, we generally skip this.

2026-05-07 12.04.09

Lay your flooring down and get it as flush to the trailer flange as you can. Be sure that you only secure the flooring with 2-3 self-tapping metal screws before you move on. You want to be sure that your last subfloor sheathing is as straight as the first, and if you take the time to put 20+ screws in the sheathing as you go, there’s a chance you’ll regret it when you get to the end!

This flooring is tongue and groove, and will automatically create the appropriate gap/spacing for you to do the installation.

Step 4 - Screw it down!

Lastly, once your subfloor is all down, you’re going to spend the next 1-2 hours screwing it down permanently. Advantech flooring has visual guides that show you where you need to attach the flooring. A good rule of thumb is to screw every 6-8 inches on the outer edges of the sheathing, and every 12 inches on the inside of the sheathing (Again, just follow the visual guide!).


Now…. you’re ready to move onto building some walls!


Do you have any ideas on how to improve a tiny house foundation or subfloor? Do you have any thoughts or experience from building your own? Share your thoughts with us!


pencil-blueprint-595986

Planning your tiny house build - 5 things to think about

1. Remember to be road legal.

You want to be sure that the end result of your tiny house build is one that you can legally tow down the road without incurring any trouble or extra costs on the way. This means you should be no more than 8’6″ wide, and 13’6″ tall from the road to the very top of the roof.

The height is ultimately the most tricky part to get correct. You need to take into account the height of the trailer, your wall framing, the extra height of your roof pitch, the roof sheathing and lastly, the final roofing material (metal roofing, etc).

2. Get your materials in the right order.

You want to make sure that you’ve acquired your materials in the right order, so you can minimize any delay in your build. Once you’ve decided on a building style/design/plan, you want to get your materials.

First, order your trailer (or find your trailer, but we recommend buying a new trailer built and designed for a tiny home! Try these guys out at trailer made - they’re the best!).

Next, order your windows. Depending on how quick you can frame your home, another long delay can be windows. You may find that you’re waiting as many as 6 weeks for a custom window order! (we’ve never had this kind of delay, but we’ve heard horror stories!).

Next, order all of your lumber and sheathing. If things work out, you’ll have a dried-in structure and very little to zero waiting time for materials!


3. Plan for the weather.

If you’re going to be building outside, you should plan for weather. Get tarps, and plan accordingly. If you know rain is coming in the afternoon, wake up early and knock out as much as you can! It’s best to frame walls and leave them covered or in a dry area until you’re able to find the time to get everything stood up and sheathed in a dry time.

Another option here is to use water-resistant materials. We always use high quality, water-resistant materials where possible. This means that we don’t have to worry much about the rain if an unexpected storm pops up and we’ve got a tiny home sitting out in the elements!

4. Source your reclaimed windows FIRST!!!

If you plan on using reclaimed windows and you’re trying to source them from a local shop, or craigslist, be sure to do this before anything else. If you have already framed your tiny house, then you are most likely stuck with finding windows that will fit inside those framed openings. Getting your reclaimed windows first means that you can make little tweaks to window openings to make sure this process goes smoothly, and much faster!

5. Get Started!

Stop thinking about doing this, and do it. I had a friend many years ago that would frequently say “Ain’t nothing to it, but to do it”. Nothing could be more true. If you want to build a tiny home, or buy a shell and finish the rest yourself, then do it already! Get financing if you need to, or look into other options (We offer in-house financing!) and make your dream a reality.

What is a “gotcha” that you’ve thought of or come across when it comes to building or buying a tiny home? Have you ever found a great resource for materials or reclaimed materials?

2025-08-05 12.40.03

Choose a Truck to Tow Your Tiny Home!

Towing your Tiny House

Tiny homes can be heavy. Depending on the length and trailer type (Standard flatbed vs Gooseneck) your tiny home can range from 6000-18000 pounds! Buying the right truck can be a seemingly daunting task. Hopefully, we can help you find your way to the right vehicle to move your beautiful home to it’s next destination!

Firstly, we don’t recommend you buy a gasoline truck. We recommend a diesel engine truck. Diesel engines will always get better gas mileage while towing versus a gasoline engine. Being environmentally conscious, diesel engines are also more “Green”. Diesel requires less to refine that gasoline (Better!). Diesel engines work at a different level of compression than gasoline, and ultimately output less emissions and carbon monoxide.

But, what about that black smoke that comes firing out of the back of diesel engines? Generally, you only find that in diesel trucks that are burning an incorrect fuel to air mixture. Most of the time this comes from people who have modified their diesel trucks for performance. Generally, two things make power in a vehicle — fuel and air, so if you’ve got black smoke you likely have an incorrect mixture of fuel vs air.

So, what kind of diesel truck should I buy?

Used Truck Recommendations:

1. 2003 to 2004½ Dodge Ram 2500 and 3500

If I were to make this post thousands of words long, you’d quickly learn that I’m a bigtime (big… big time) fan of Dodge trucks. The in-line 6 cylinder diesel is a great option and produces great power. Depending on the model, you can get towing capacity with this truck that ranges from 15k-16k lbs.

2. 2006 to 2007 Chevy and GMC 2500 and 3500

Chevy and GMC are well known for having fantastic transmissions, but produce moderate power. You can expect towing capacity with this model to range from 9k-11k lbs. Of all Chevy & GMC trucks, this has been one of the best models ever produced.

3. 1996 to 1998 Dodge Ram 2500 and 3500

This variation of the dodge ram will likely be known as one of the most reliable trucks ever made. You can expect towing capacity of 9200-9800 lbs. If you can find a used one of these with less than 200k miles, it might be worth looking at!

4. 1999½ to 2000 Ford Super Duty

This Ford is one we feel comfortable recommending. This version of the 7.3l diesel engine has proven to have had most of the problems resolved and is very reliable. You can expect towing capacity of 13-14k pounds.

5. 2008 to 2010 Ford F-250 and F-350

Frankly, we will begrudgingly recommend this truck. The 6.4l diesel engine has proven to be quite reliable and producing decent power, however this truck is plagued with a radiator problem. We owned a 2008 F-350 and felt like we couldn’t trust this truck until we replaced the stock radiator with a mishimoto aluminum radiator. You can expect towing capacity to range from 8k-13k lbs.

All of these trucks allow great aftermarket options to produce some extra power. We’ll talk about that in another post!


Common Truck Questions:

Q. Can’t I just add aftermarket parts to my truck to make it tow more?
A. Yes and No. Adding horsepower or torque to a truck will definitely make it capable of towing more, but that doesn’t mean you should. Towing puts a lot of pressure on a truck in multiple ways. This includes the engine, frame, suspension and brakes. Just because you added enough power to your truck to tow 20k lbs, doesn’t mean that your frame can handle it, or your brakes will be able to stop it.

Q. Can I increase the capacity of the bed of the truck?
A. Yes and No…. If you want to be able to tow heavier weight, or have a heavier capacity in the rear or bed of the truck, the best way to do that is to add air bags to your truck’s suspension. Firestone is a great product and good place to start http://www.firestoneip.com/ Another option is to add a leaf spring, but I’d prefer the air bags!

What kind of truck do you have to tow your tiny home? Do you have any other ideas for towing a tiny home? Do you have any experience with a truck, or aftermarket truck part/upgrade that you could share your thoughts on?