When building anything, the end result will only be as good as the foundation it was built on. Nothing can be more true and crucial for a tiny home. Some people decide to build their tiny homes on a solid foundation, or skids, but most will end up building on a trailer for various reasons.
Our latest build is on a custom trailer built locally by Trailer Made. As a disclaimer - We’re making this endorsement of Trailer Made tiny house trailers on our own accord, without any request from Trailer Made Custom Trailers, LLC. We’ve built on equipment trailers in the past, but decided to move to a trailer built specifically for tiny homes and we can say that we’ll never go back to building on anything else again! These trailers are built rock-solid and provide you many benefits over buying a different trailer.
If you’ve received a tiny house trailer and you’re ready to get started on your build, it’s critical that you take the time to complete all necessary steps here in the right order. By the time your subfloor is done, you need to be sure of a few things.
- Your subfloor needs to be able to breathe.
- Your subfloor needs to be insulated.
- Your subfloor sheathing needs to be sturdy, installed correctly and secured to the trailer.
Steps to build your subfloor & foundation
Before you get started, get your materials together. We generally use a combination of rigid foam insulation and canned/spray-foam insulation in the subfloor. We also use a sill sealer to prevent some thermal bridging from the metal framing of the trailer. We only use Advantech subfloor sheathing, and since this is being attached to metal framing on a trailer, we also use 2” self-tapping metal screws.
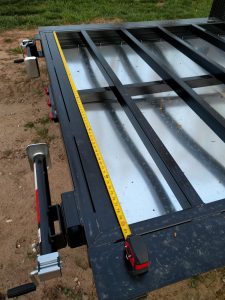
Step 1 - Insulate the subfloor.
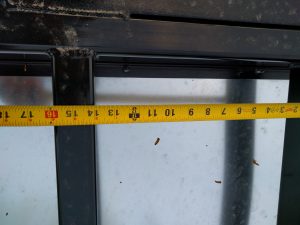
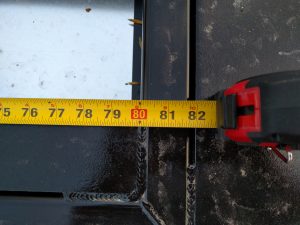
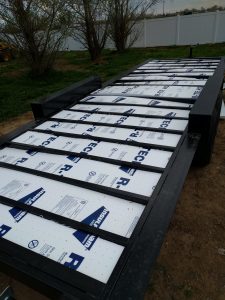
We measure the depth of the trailer cavity, as well as the width between the metal framing. In our case, the trailer has a 3” depth, and 14” widths throughout most of the trailer, and a length of 80” between the metal framing as well.
When you’ve got these measurements, start cutting down your rigid foam insulation so that it will snugly fit into these areas. It’s important that you use more than one piece of foam insulation in each cavity to get to the full 3” depth. The reason for this is that you can use the vapor barrier of the foam insulation on both the top and bottom of the cavity.
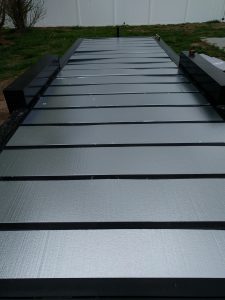
After you’ve got the floor completely insulated, fill any gaps or cracks with canned foam insulation. This is a very important step!
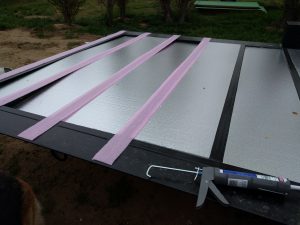
Step 2 - Insulate the metal framing.
Using sill sealer and some construction adhesive, cover each metal framing stud of the trailer with this foam padding. This will not remove all thermal bridging, but it will help significantly.
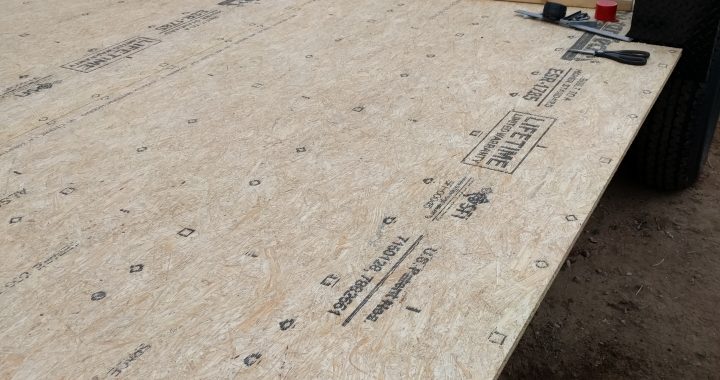
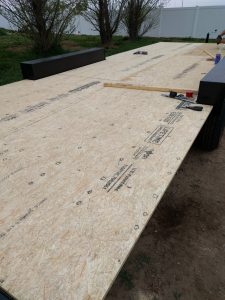
Step 3 - Sheath the floor.
As I mentioned before, we only use Advantech flooring. There are several reasons for this, but the main reason is that this engineered flooring is exceptionally water resistant. During construction, your floor WILL get wet, and Advantech flooring will not suffer any negative effects from this. You can read more about AdvanTech flooring here
You may be tempted to lay the flooring across the 8ft of the trailer, and just work your way from the front to the back of the trailer (or vice-versa), but you must avoid doing this. Subflooring is designed (and much more sturdy) when it’s installed perpendicular to the floor studs/joists of the trailer. Staggering the seams of the flooring is another good idea, but with such a small space and such an incredibly strong foundation, we generally skip this.
Lay your flooring down and get it as flush to the trailer flange as you can. Be sure that you only secure the flooring with 2-3 self-tapping metal screws before you move on. You want to be sure that your last subfloor sheathing is as straight as the first, and if you take the time to put 20+ screws in the sheathing as you go, there’s a chance you’ll regret it when you get to the end!
This flooring is tongue and groove, and will automatically create the appropriate gap/spacing for you to do the installation.
Step 4 - Screw it down!
Lastly, once your subfloor is all down, you’re going to spend the next 1-2 hours screwing it down permanently. Advantech flooring has visual guides that show you where you need to attach the flooring. A good rule of thumb is to screw every 6-8 inches on the outer edges of the sheathing, and every 12 inches on the inside of the sheathing (Again, just follow the visual guide!).
Now…. you’re ready to move onto building some walls!
Do you have any ideas on how to improve a tiny house foundation or subfloor? Do you have any thoughts or experience from building your own? Share your thoughts with us!